

From 0 to 100 in 30 minutes - IoT with C#
My interest for the Internet of Things (IoT) was sparked many moons ago, way before the name was born. Back in the days I wrote software for PalmOS devices, and I was intrigued by having raw processor power in my Pocket. Don’t get me wrong, back then we where talking Megahertz instead of Gigahertz and Kilobyte instead of Gigabyte. Having such limitations in processing power and memory tickled my creativity. When I had the opportunity to control hardware (gps, electronic locks etc) using the little devices I was sold. Fastforward to a couple of years ago when the market was flooded with Arduinos and Raspberry Pis, I picked up an old hobby and started developing again, this time playing around with sensors. The big disadvantage was that you had to resort to plain old C and a crippled development environment, until now…
At the last innovation day at Xpirit, I teamed with a group of like-minded collegues and tinkered a day with a solution around Azure IoT. A collegue and I tried to flash an ESP8266 board to run the .Net NanoFramework: The NanoFramework is a slimmed down version of the .Net Framework, targeted to run on an ESP32 device.
It turned out that the board we had was not suitable to run the NanoFramework. I decided to order a new ESP32 board and started tinkering with it. In this blog post I’ll give you a jump start to get you and your Windows development machine up-to-speed under 30 minutes.
Prerequisites
An compatible ESP32 board I used an ESP-WROOM-32 board (amazon.com).
Micro USB cable
Your Windows 10/11 environment should be equiped with:
Microsoft .Net 6 SDK
Visual Studio 2022 - version 17.1.1 and up
Nano Firmware Flasher (nanoff)
This software can be downloaded from https://github.com/nanoframework/nanoFirmwareFlasher
Preparations
First I do the preparations for the device, then the preparation for Visual Studio.
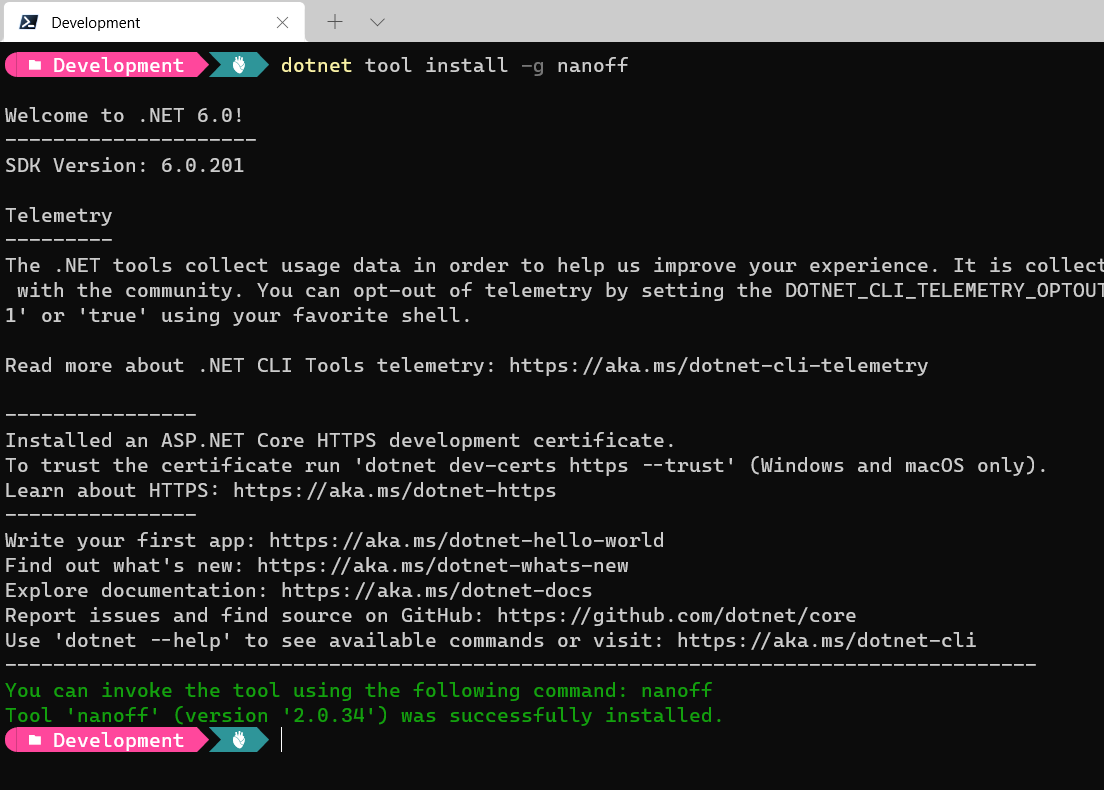
Install nanoff
Nanoff is the tool that is used to flash the NanoFramework firmware to the ESP32, this can be installed by entering the following command:
dotnet tool install -g nanoff
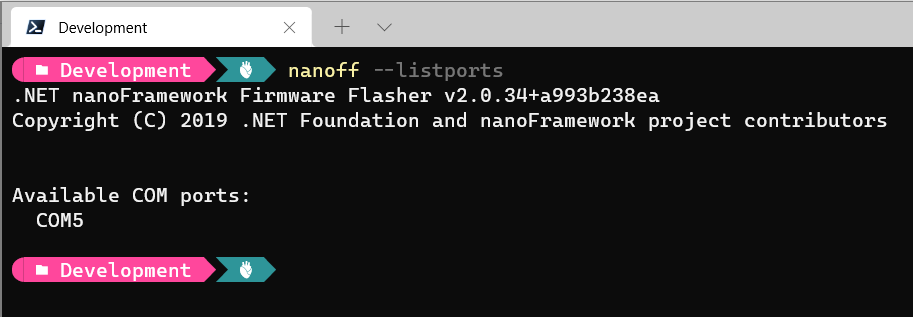
Find available com ports
Now it is time to hook up the ESP32 board to your computer over USB. Once done, enter the following command to get the available COM ports on your machine:
nanoff --listports
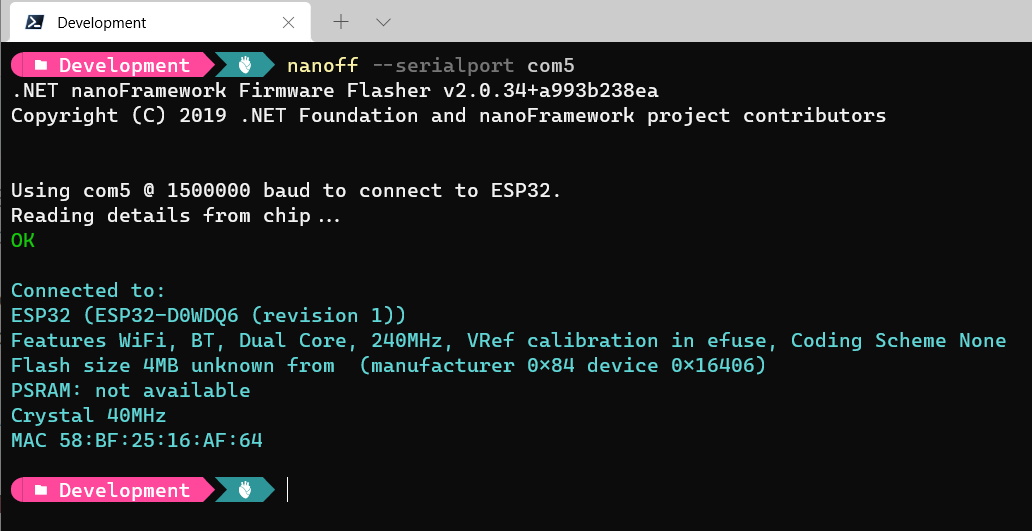
Test device communication over nanoff
Make sure that the board can be read from nanoff. This can be done by entering the following command:
nanoff --serialport com5
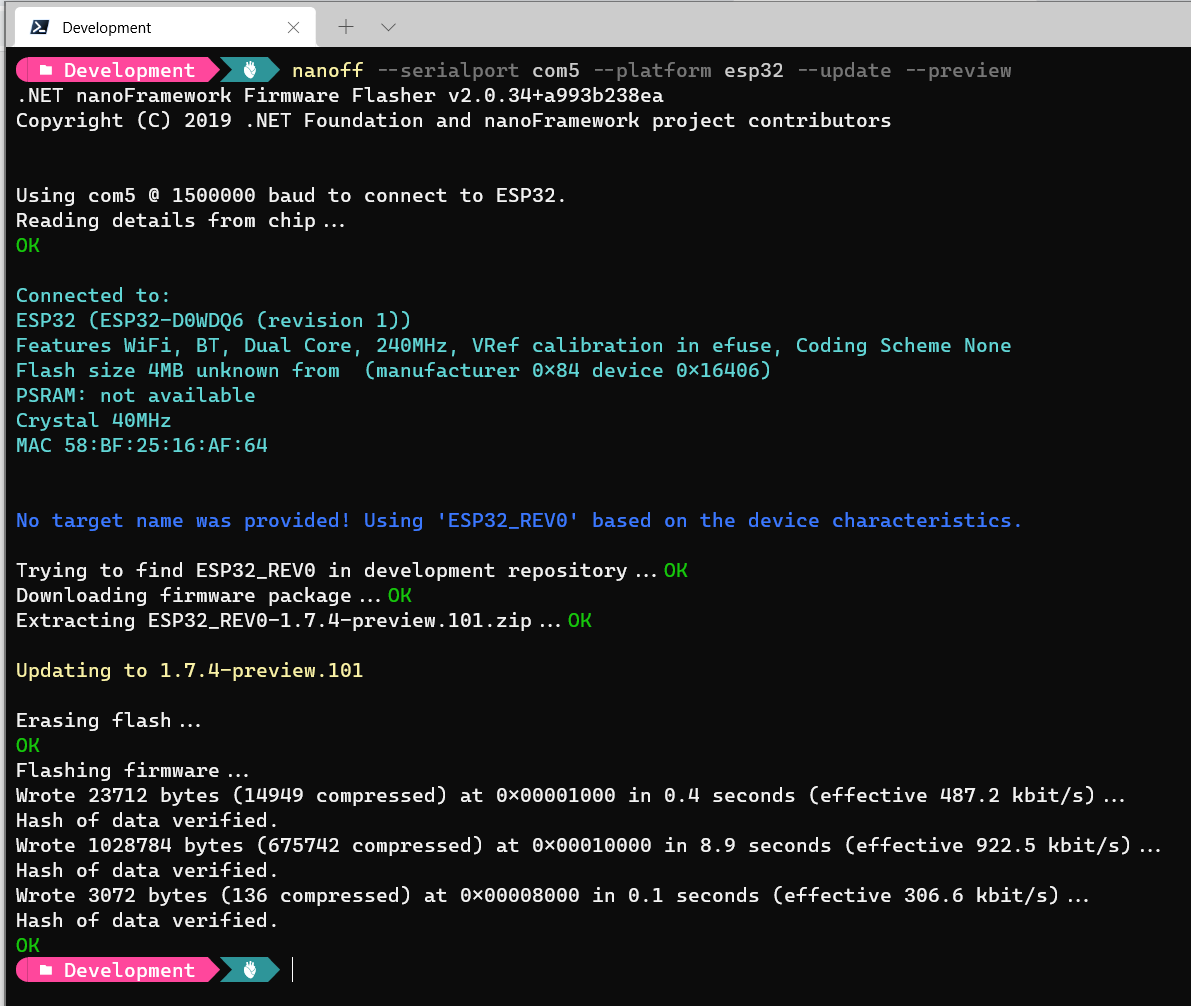
Flash the device
After communications have been tested, the time has come to flash the device with the nanoframework. In nanoff you can either choose to specify a specific image (–target MY_TARGET_NAME_HERE) that needs to be flashed or you can let nanoff choose an image for you (–platform esp32 –preview). I choose the latter option.
nanoff --serialport com5 --platform esp32 --preview
Prepare Visual Studio 2022
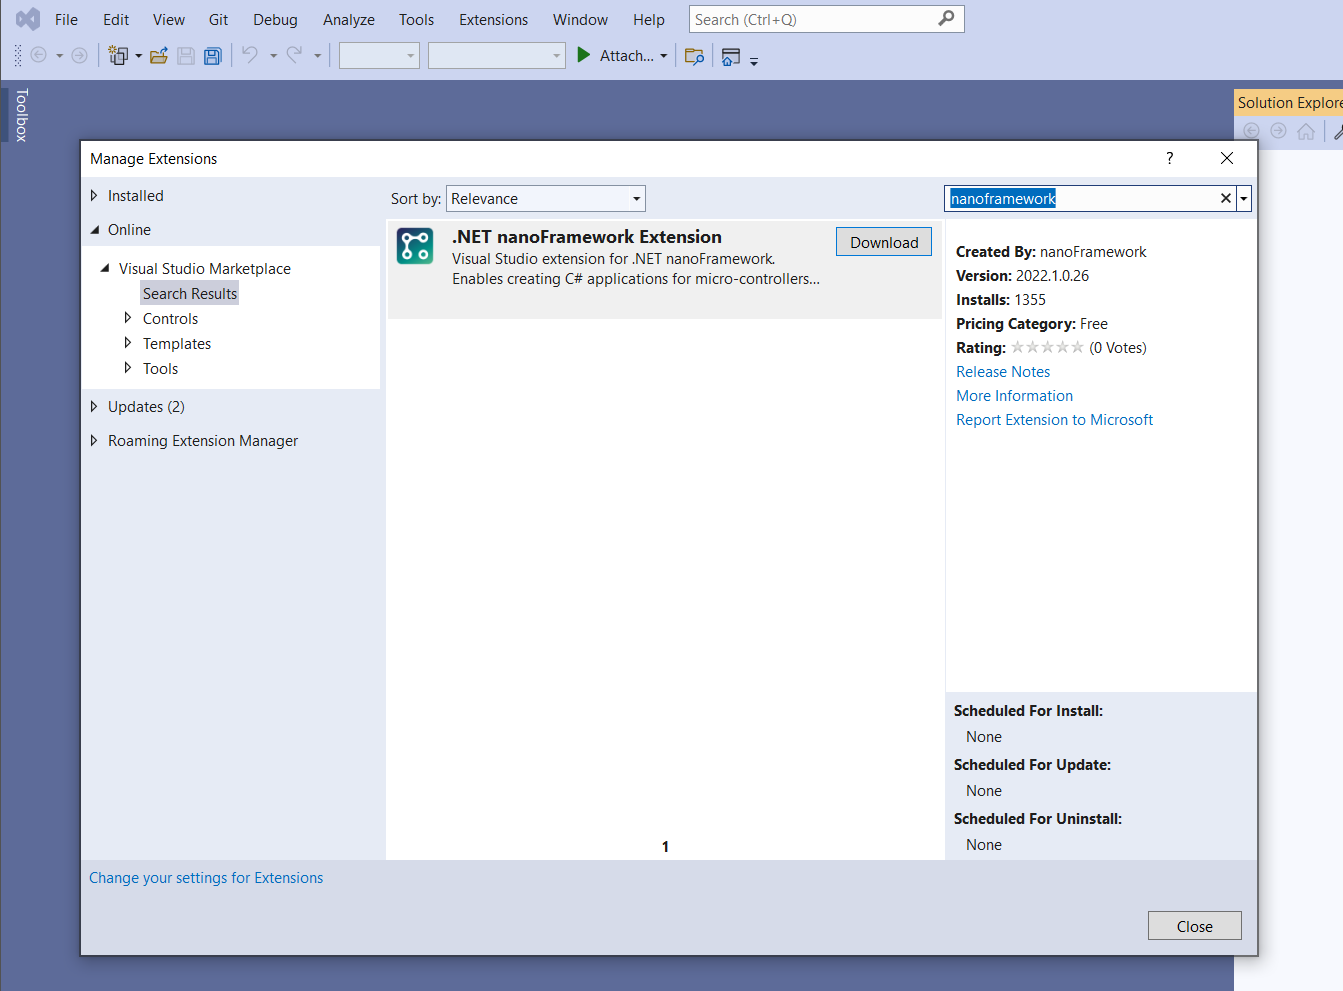
Before Visual Studio 2022 can be used the NanoFramework extension needs to be added.
- Open Visual Studio
- Go to Extensions –> Manage Extensions
- In the search box enter “nanoframework”
- Download and install the .Net nanoframework Extension
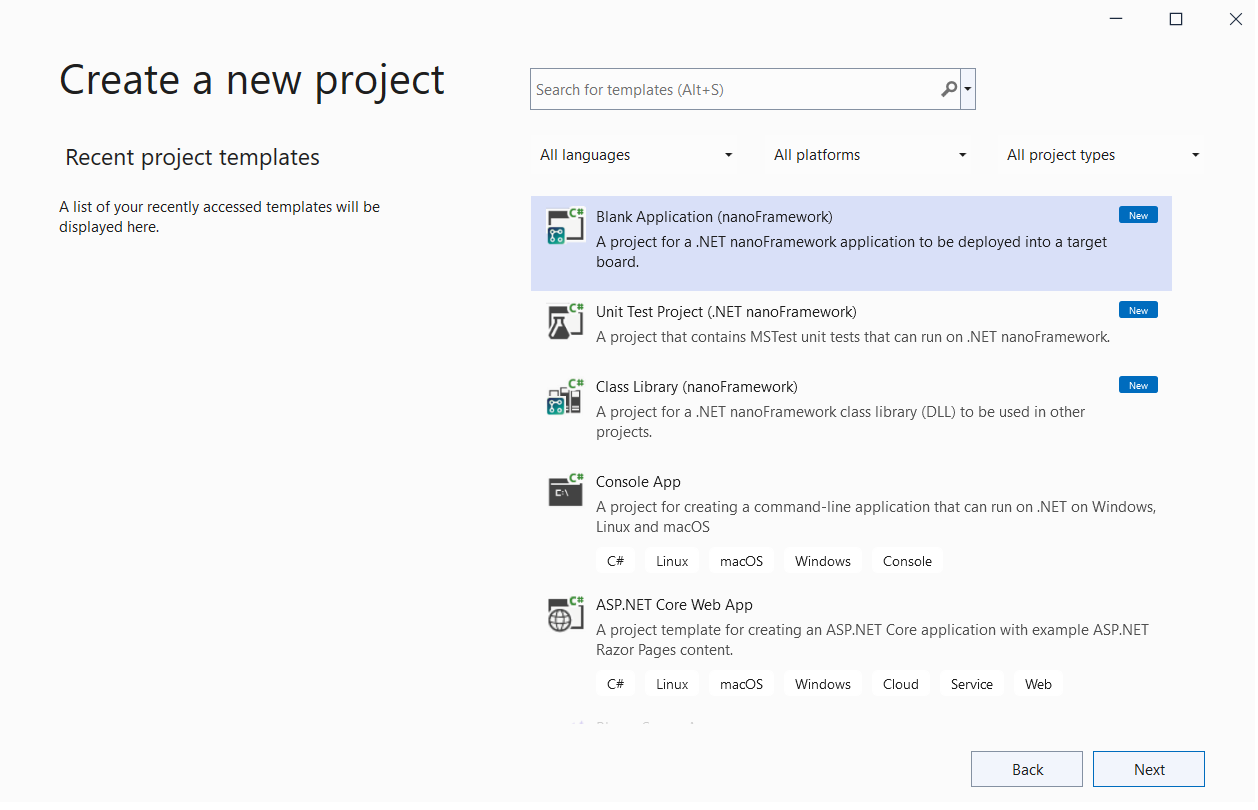
Development time
When Visual Studio is restarted, you have 3 new project types which are targetting the NanoFramework. In here I choose for “Blank Application (nanoFramework)” and create a new solution.
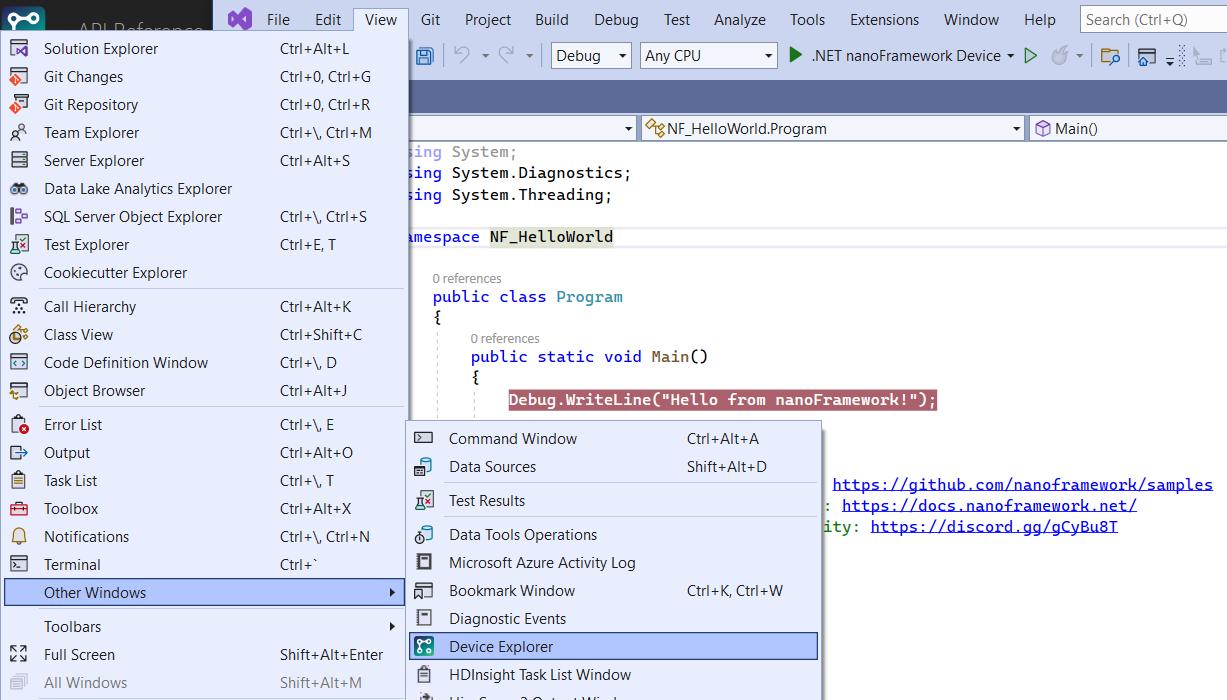
Before I can deploy the application to the ESP32 device, I need to add the Device Explorer.
- Go to View –> Other Windows –> Device Explorer
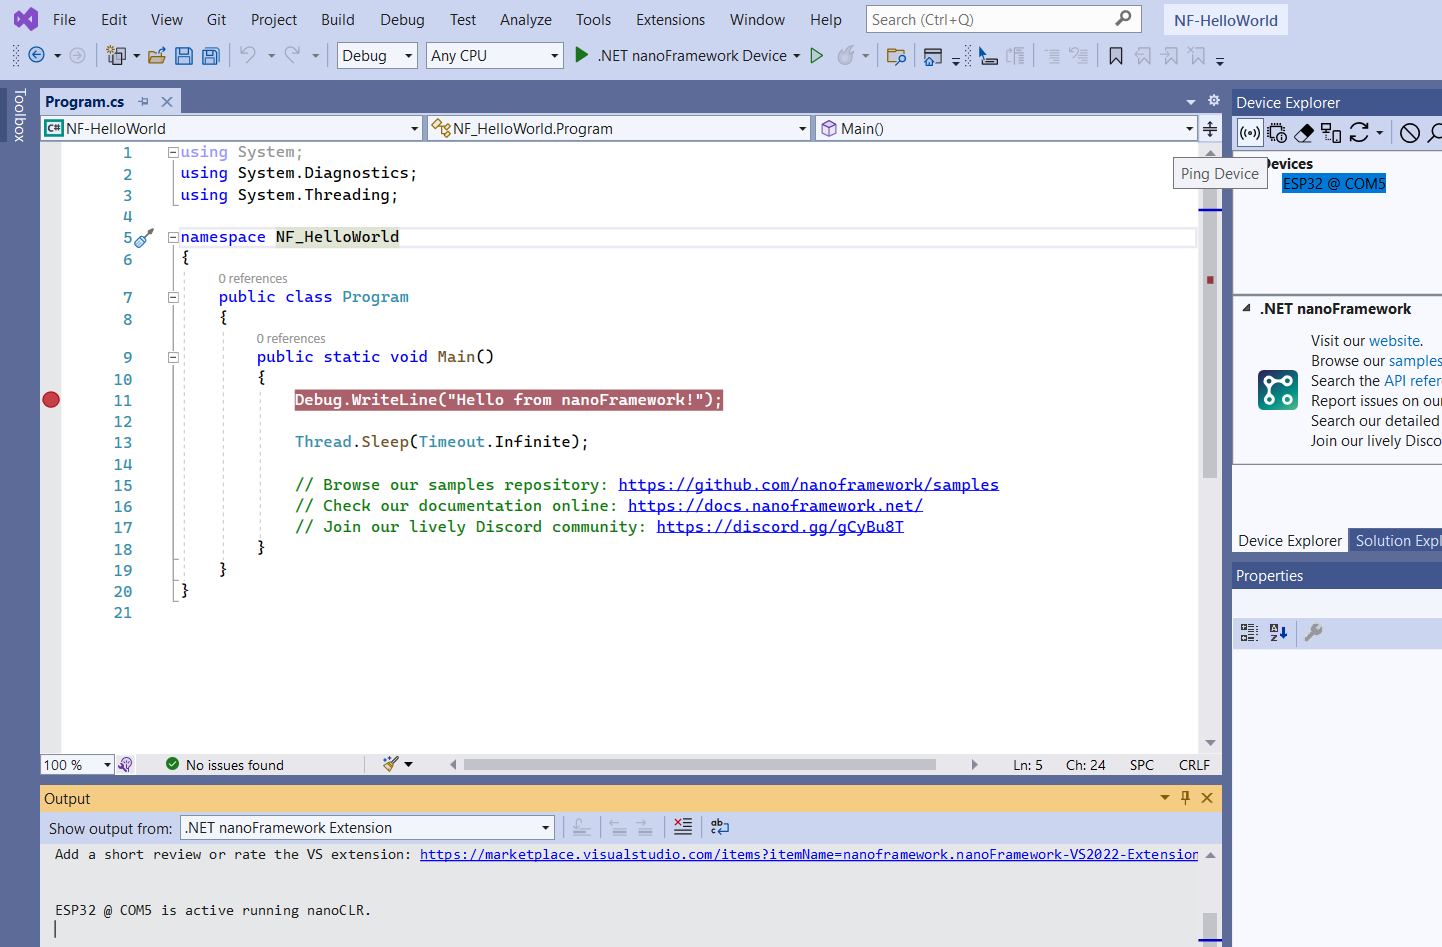
In the Device Explorer I select my device that appears and press the “Ping” button to test the communication. A confirmation is printed in the Output pane.
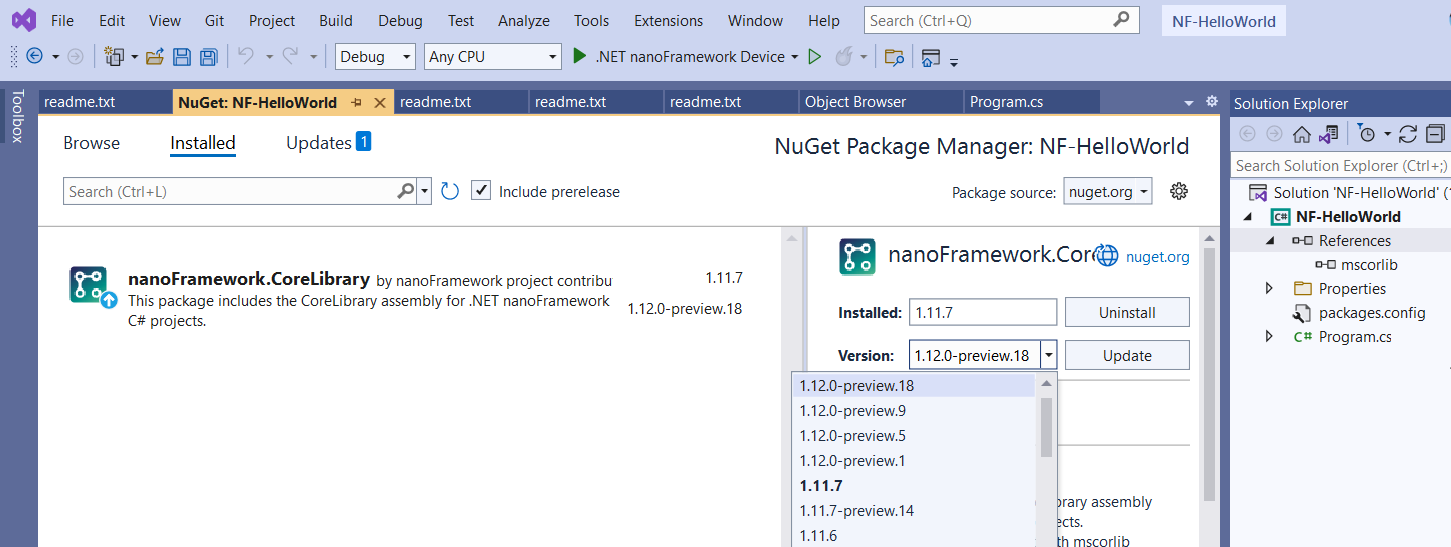
Ensure correct version of mscorlib
Before deploying the software to the device, it is important that the mscorlib is compatible with the firmware on the ESP32 device. Go to the NuGet package manager and update it to a matching version. In my was was this the latest preview version (as I specified the –preview for the flash operation in nanoff). If the versions are not compatible an error message will appear in the output pane indicating that the versions have to match (troubleshooting)
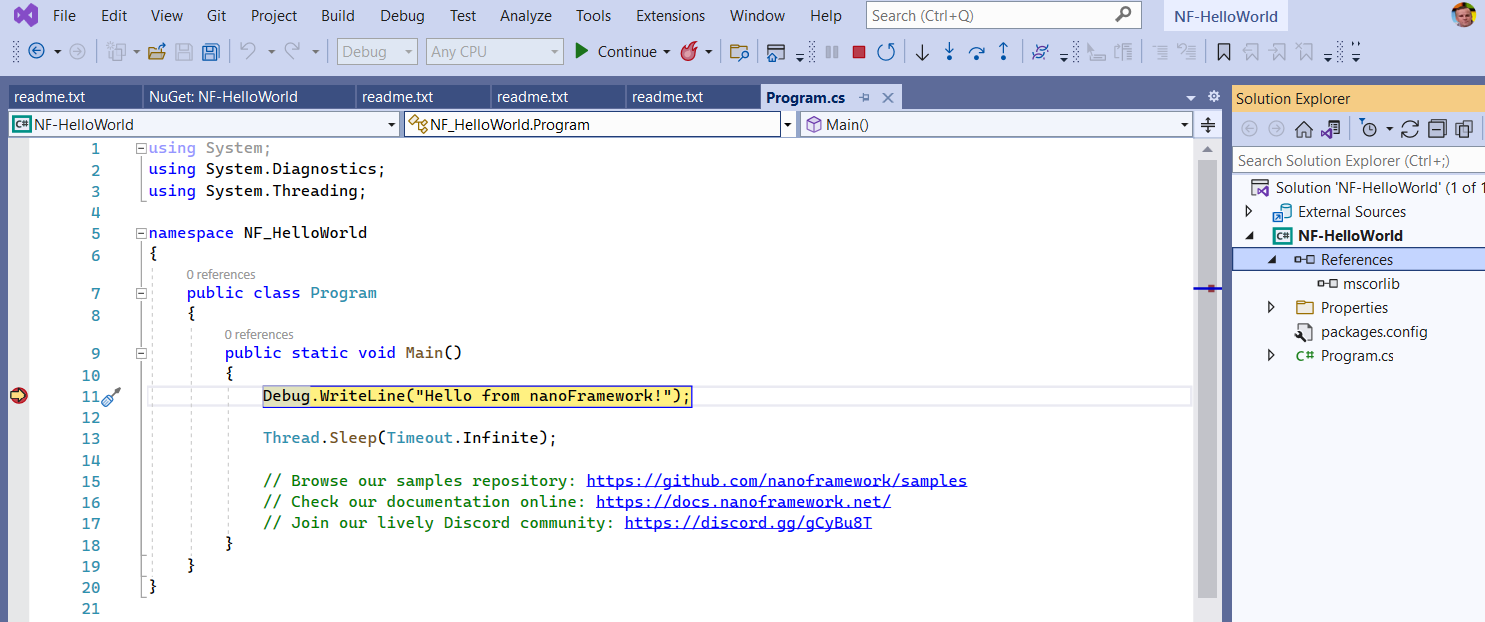
Time to debug….
When you right click the project, you can choose “Deploy”. With this option the software will be uploaded to the device. Pressing F5 starts a debug session on the device.
This provides me with a good starting point to hook up the device to the Azure IoT hub and start experimenting with the Device Provisioning Service…