Practice what you preach!
When I decided to start blogging again, I knew I wanted to talk about the things I face, working with Azure. In the past I used to blog as well, back then I blogged on my Journey into CRM which I started in 2014.
In 2014 the state of technology was much different; one would use WordPress (or similar). The main choice was host it yourself or host it at a hosting provider. Back then I chose the way of hosting it myself on a small linux appliance from my basement.
For starters I knew, I didn’t want to host this new blog myself! Too much hassle… being responsible for applying continuous security updates, having to worry about power supply, state of hardware and connectivity. Starting a new blog, gave me the opportunity to start with a clean slate. Since I decided to start blogging about Azure, I knew I had to run it on Azure. Practice what you preach!
Using Azure to host a blog, gives you a lot of possibilities to choose the technologies you feel comfortable with. However running on Azure means you have to take into account that running on Azure might cost you money. Choosing the right technologies and plans might save you some serious money in the end.
After some research on the web and talking to my colleagues the tool Hugo popped up many times. Hugo is a static website generator that uses markdown files for its input. This means that I can use a simple text editor to write my content. Run the Hugo tool to compile a wbsite and then upload it to static storage to host my website; I don’t need an app plan. I just need storage, domain name (dns provider) and an SSL certificate. Poof! mind blowing
I decided to give it a try, downloaded Hugo, chose a template and compiled a website. That was a breeze! The next step was to create a resource group and a storage account. On the storage account I had to enable the static Website option.
By enabling the static website option, Azure creates a $web folder in which the content of the site has to be placed. By placing the content in the folder, the website was up-and-running under an “ugly” Azure url.

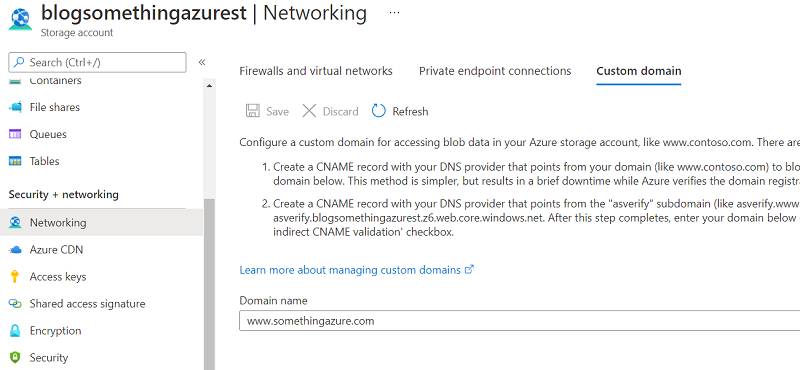
Next step was to apply the custom domain name to the website. This was done under the Networking option, custom domain tab. This resulted in a website that could be accessed over the unsecured Http protocol and under single domain name. I was almost there.
The final step was to use a SSL certificate to secure the connection to the website. Unfortunatelly the Azure storage account does not provide an option to use your own certificate for your custom domain name. In order to do that I had to resort to the Azure CDN option (Content Delivery Network). By choosing that option I was able to run a secured website accessible under multiple domain names.

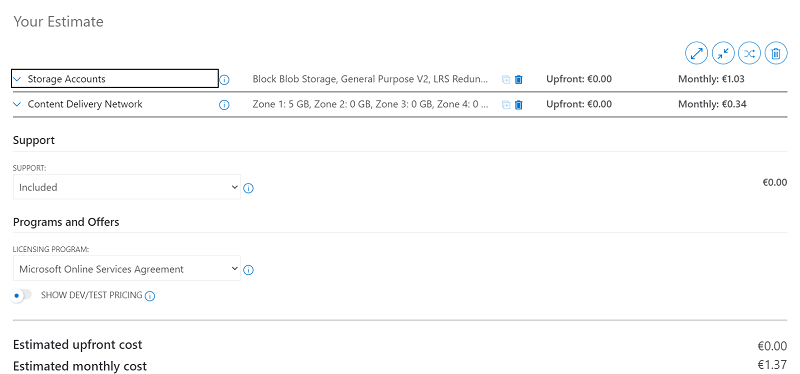
When looking at the cost side of things - I run this blog on an Azure pay-as-you-go consumption plan - the costs will be approximately € 1,37 per month. Not a bad deal at all.


