

Minikube, a lightweight Kubernetes-to-go!
From time-to-time I find myself tinkering with Kubernetes. I love the idea that I can create any type of workload (e.g. a simple webapp or a backend service), pick it up and put it somewhere else to run. Not having to care if it is in the cloud or on an on-premise cluster. However developing your application, testing its core in a local docker container and then deploying it to kubernetes can sometimes be cumberstone.
Having a full-blown kubernetes running on your development machine isn’t something that I desire; personally I like to keep my machine as lean and mean as possible. I would love to develop and test my Kubernetes orchestrations locally, before I release them into the wild. A good solution: Minikube.
In this blog post I describe how you can start using it on Windows 11, without having to reinvent the wheel.
Prerequisites
In order to use Minikube, your windows 11 machine has to be equiped with:
WSL2
WSL is the “Windows Subsystem for Linux”. MS-Learn has a good article on enabling WSL2 on Windows. Once WSL is enabled and the Linux distribution of choice is installed, perform the following check to see if the Linux distribution runs in WSL 2 mode. WSL can run distributions in both v1 or v2 mode.
To check the WSL mode, run:
wsl.exe -l -v
To upgrade your existing Linux distro to v2, run:
wsl.exe --set-version (distro name) 2
To set v2 as the default version for future installations, run:
wsl.exe --set-default-version 2
Docker Desktop v20.x and up
Download Docker Desktop for Windows and start the installation once WSL2 installation finished. During installation specify that WSL2 has to be used.
The Windows Subsystem for Linux (WSL) 2 introduces a significant architectural change as it is a full Linux kernel built by Microsoft, allowing Linux distributions to run without having to manage Virtual Machines. Docker Desktop uses the dynamic memory allocation feature in WSL2 to improve on resource consumption. This means, Docker Desktop only uses the required amount of CPU and memory resources it needs, while enabling CPU and memory-intensive tasks such as building a container to run much faster.

Installing Minikube
Download Minikube by going to this Page.
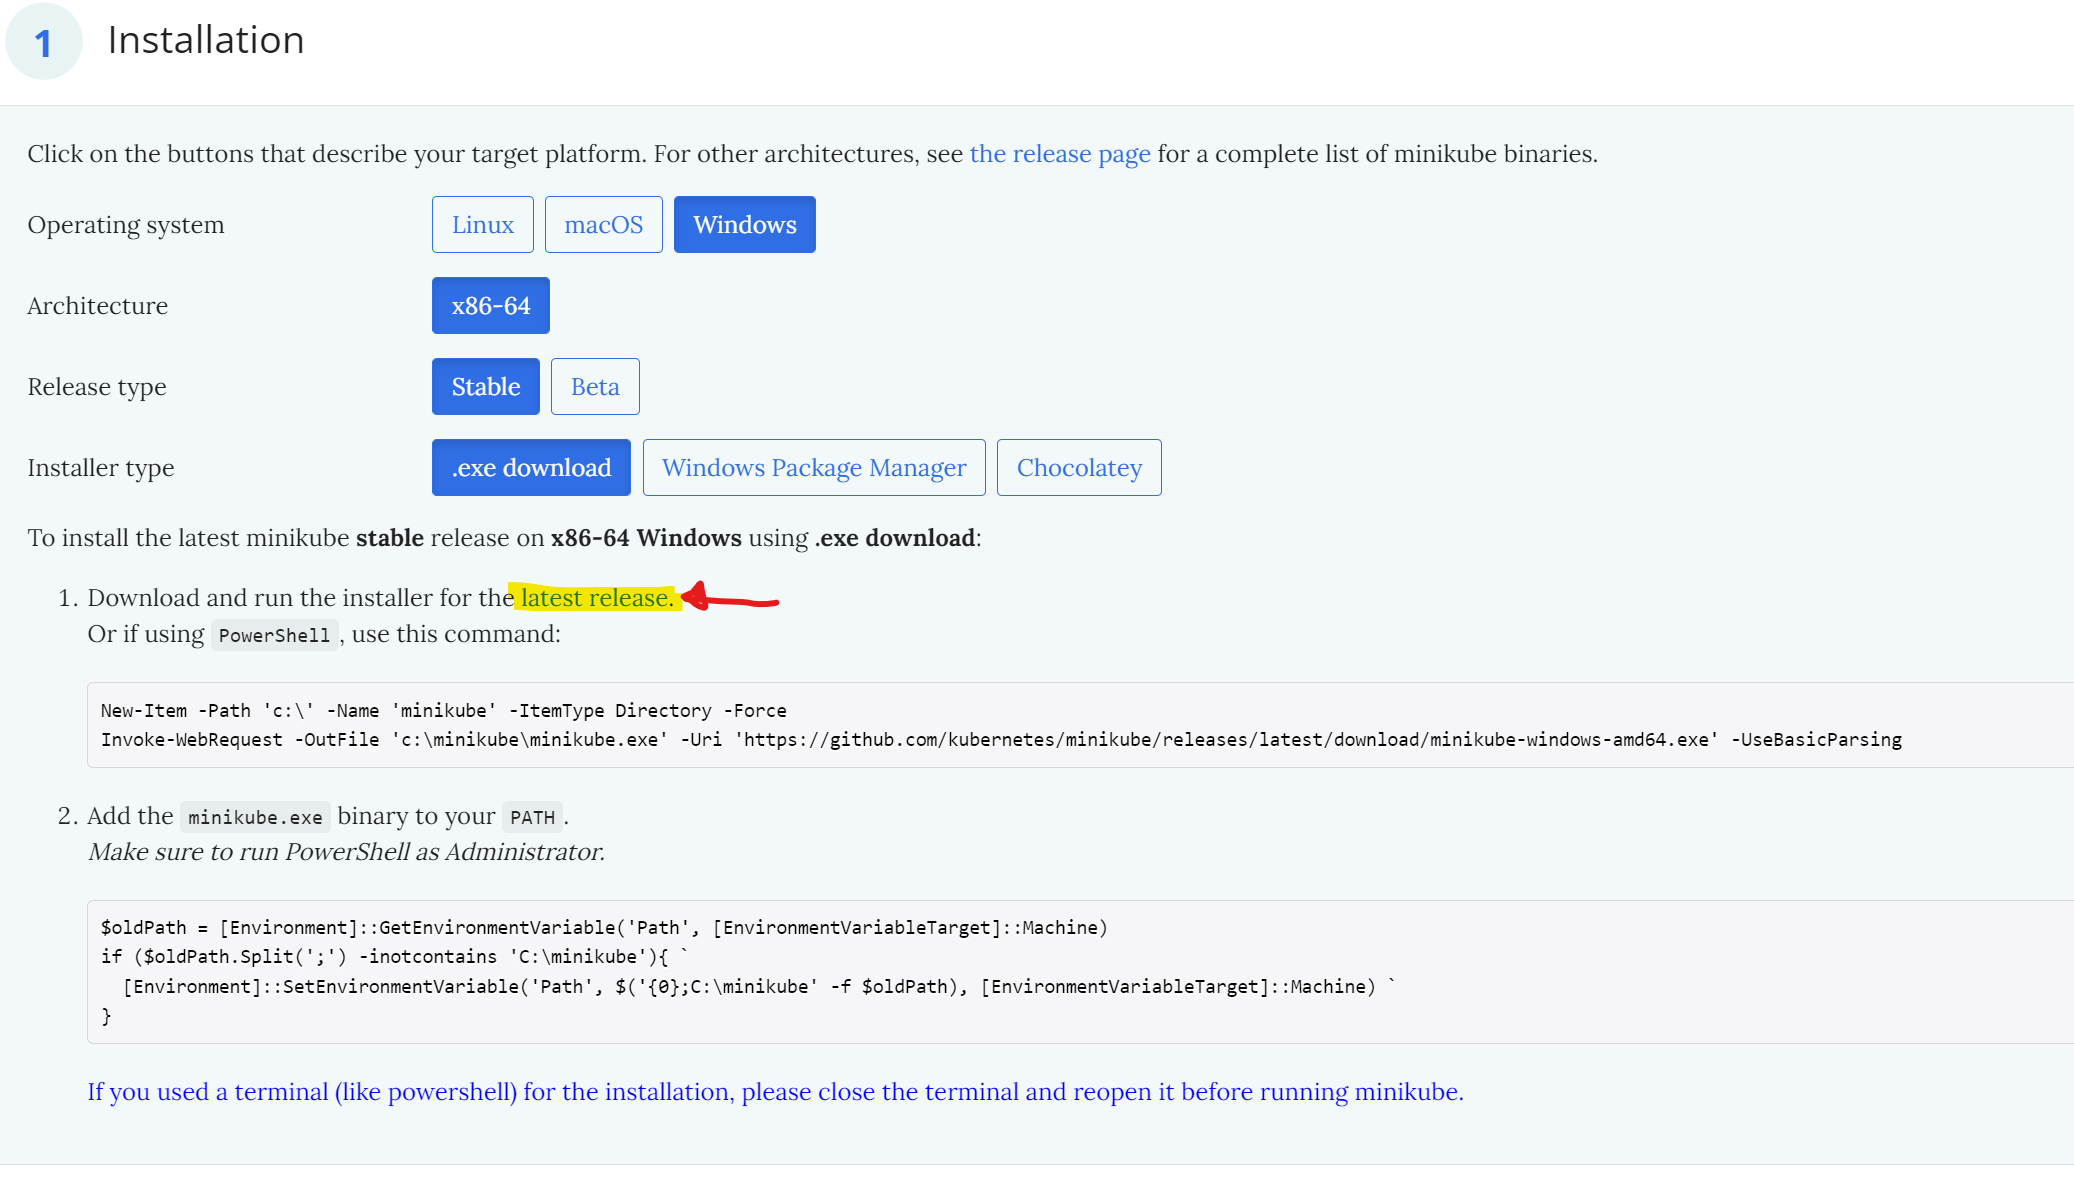
Choose the Binary for Windows and either click the “latest release” link or follow the Poweshell instructions in the blue pane. During the installation procedure specify that Docker has to be used for running the containers. The containers that are being used by Minikube itself to host its own processes, are ran on the local Docker Desktop Engine.
Running Minikube
Once everything is installed, it’s time to get your hands dirty, time to fire up a Powershell terminal.
Minikube has to be started manually, so to start Minikube enter the following command
minikube start
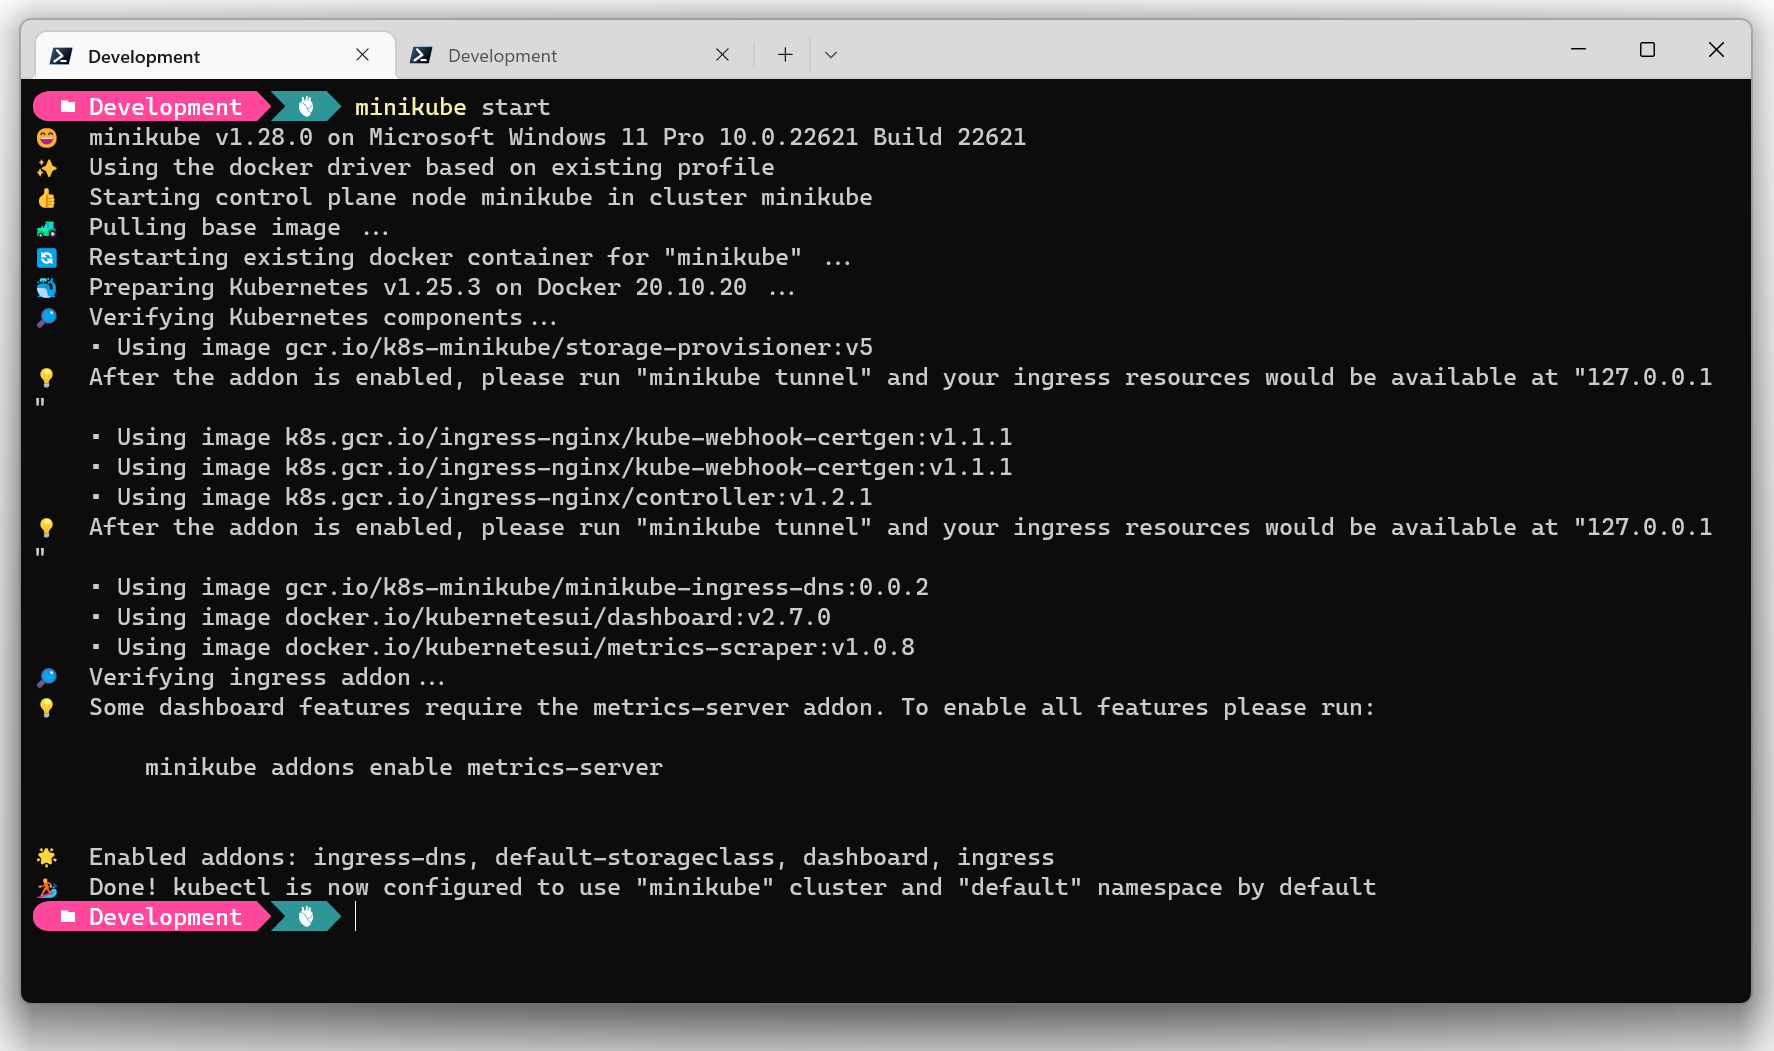
From this point on, a development Kubernetes cluster (with a single system node) is available. The command kubectl can be used to manage the various resources on the cluster, such as pod, ingress, service, secret etc.
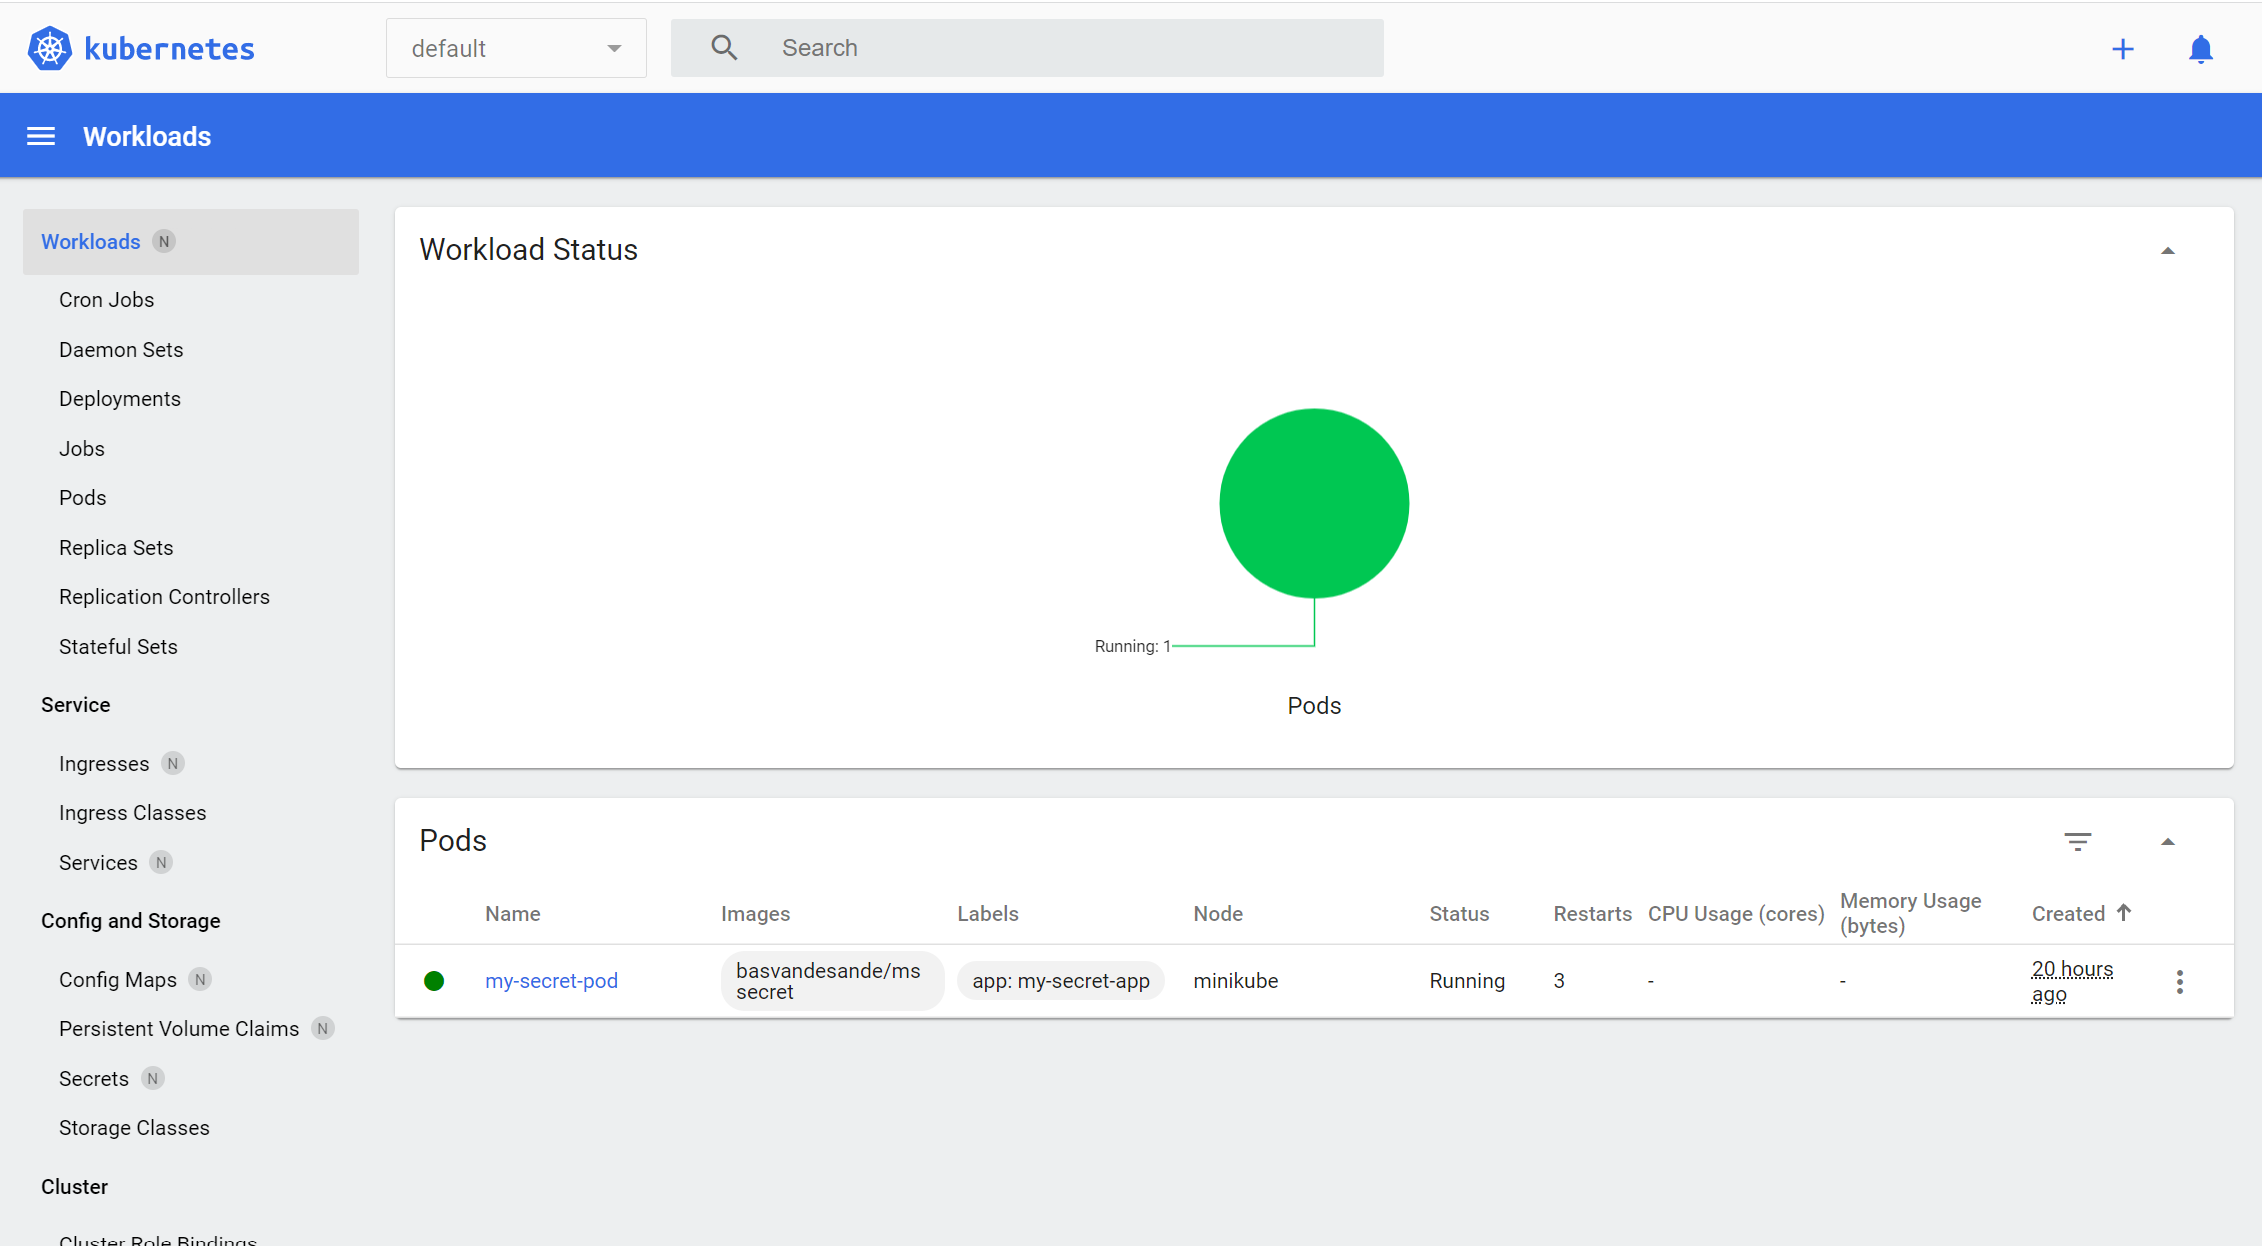
Minikube dashboard
Minikube comes with a management dashboard in which the cluster can be managed. To start the dashboard, enter the following command in a new terminal window.
minikube dashboard
Running the first orchestration
I created a small web application using dotNet 6.0 in a docker container. I tested the application on docker and it ran like a charm. The next step was to create a pod, a service and an ingress to host the web application on Minikube.
apiVersion: v1
kind: Pod
metadata:
  name: my-secret-pod
  labels:
    app: my-secret-app
spec:
  containers:
    - name: my-secret-container
      image: basvandesande/mssecret
      ports:
      - containerPort: 80
  restartPolicy: Always
---
apiVersion: v1
kind: Service
metadata:
  name: my-secret-service
spec:
  type: NodePort
  selector:
    app: my-secret-app
  ports:
  - name: my-secret-service-port
    protocol: TCP
    port: 30080
    targetPort: 80
---
apiVersion: networking.k8s.io/v1
kind: Ingress
metadata:
  name: my-secret-ingress
spec:
  rules:
    - http:
        paths:
          - path: /
            pathType: Prefix
            backend:
              service:
                name: my-secret-service
                port:
                  number: 30080
The logic in the yaml is straight forward.
- The ingress is configured to forward all incoming http traffic to the service (incoming port: 30080).
- The service forwards the incoming traffic on port 30080 to port 80.
- The web application in the pod listens to port 80.
The resources were created on the Minikube cluster using the following command
kubectl create -f mssecretstuff.yml
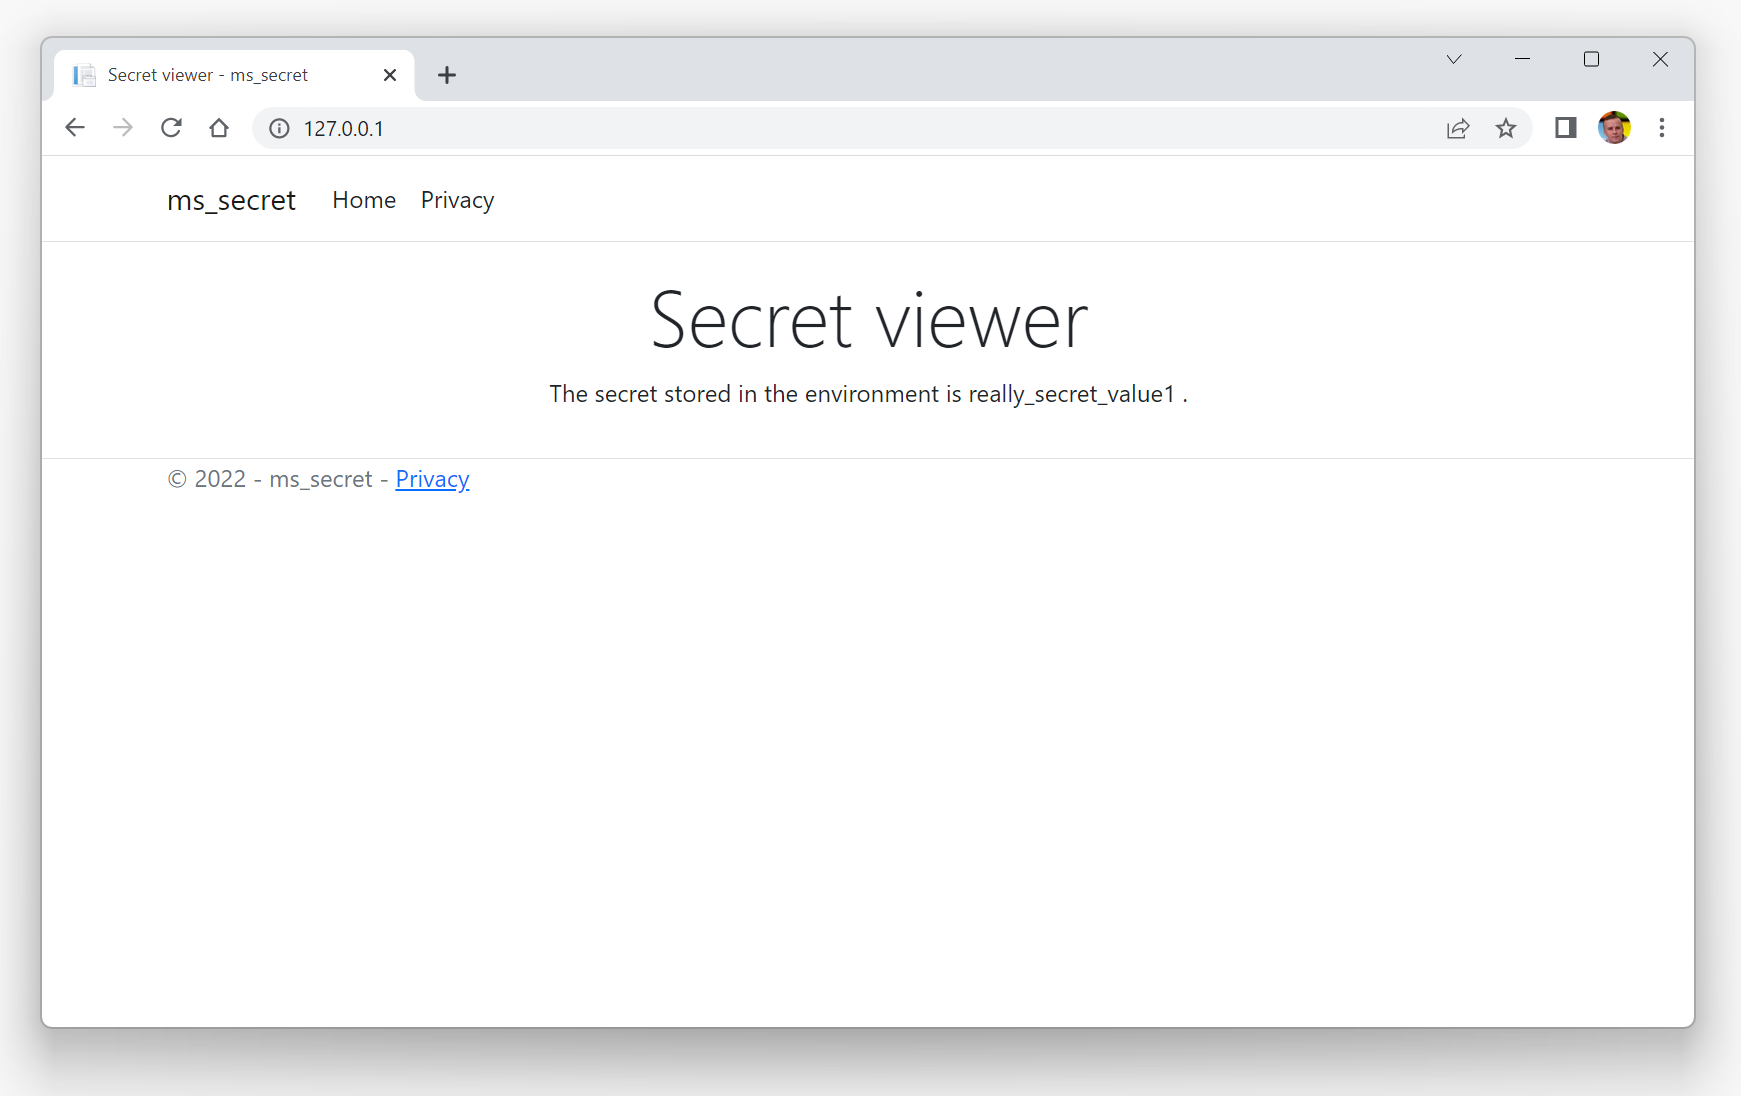
I opened browser and navigated to localhost (127.0.0.1) to view the page, and it failed….
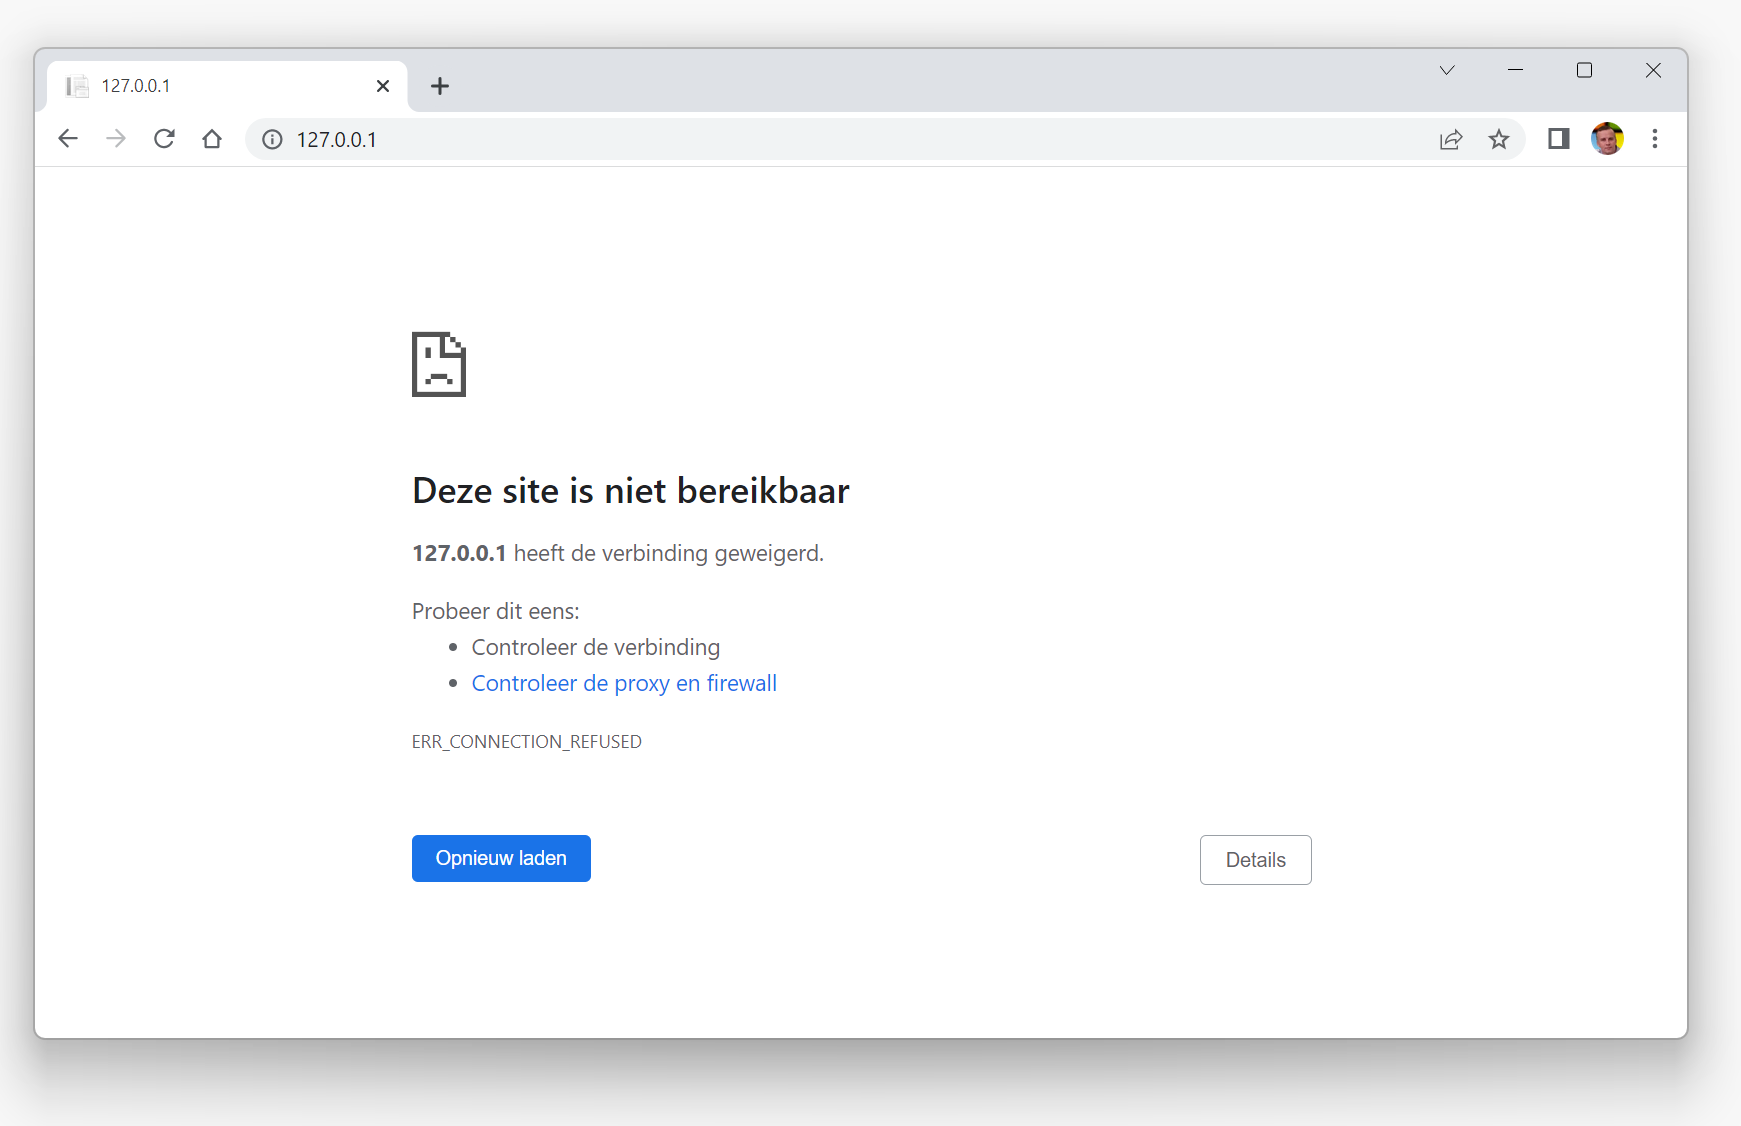
Use the Tunnel, Luke!
This costed me a while to figure out (just because I didn’t read the documentation). In order to work with Ingress on Minikube, you need to set up a tunnel. The tunnel captures all traffic sent to localhost and forwards it to the running Minikube instance. To activate the tunnel, open a new terminal window and enter the following command
minikube tunnel
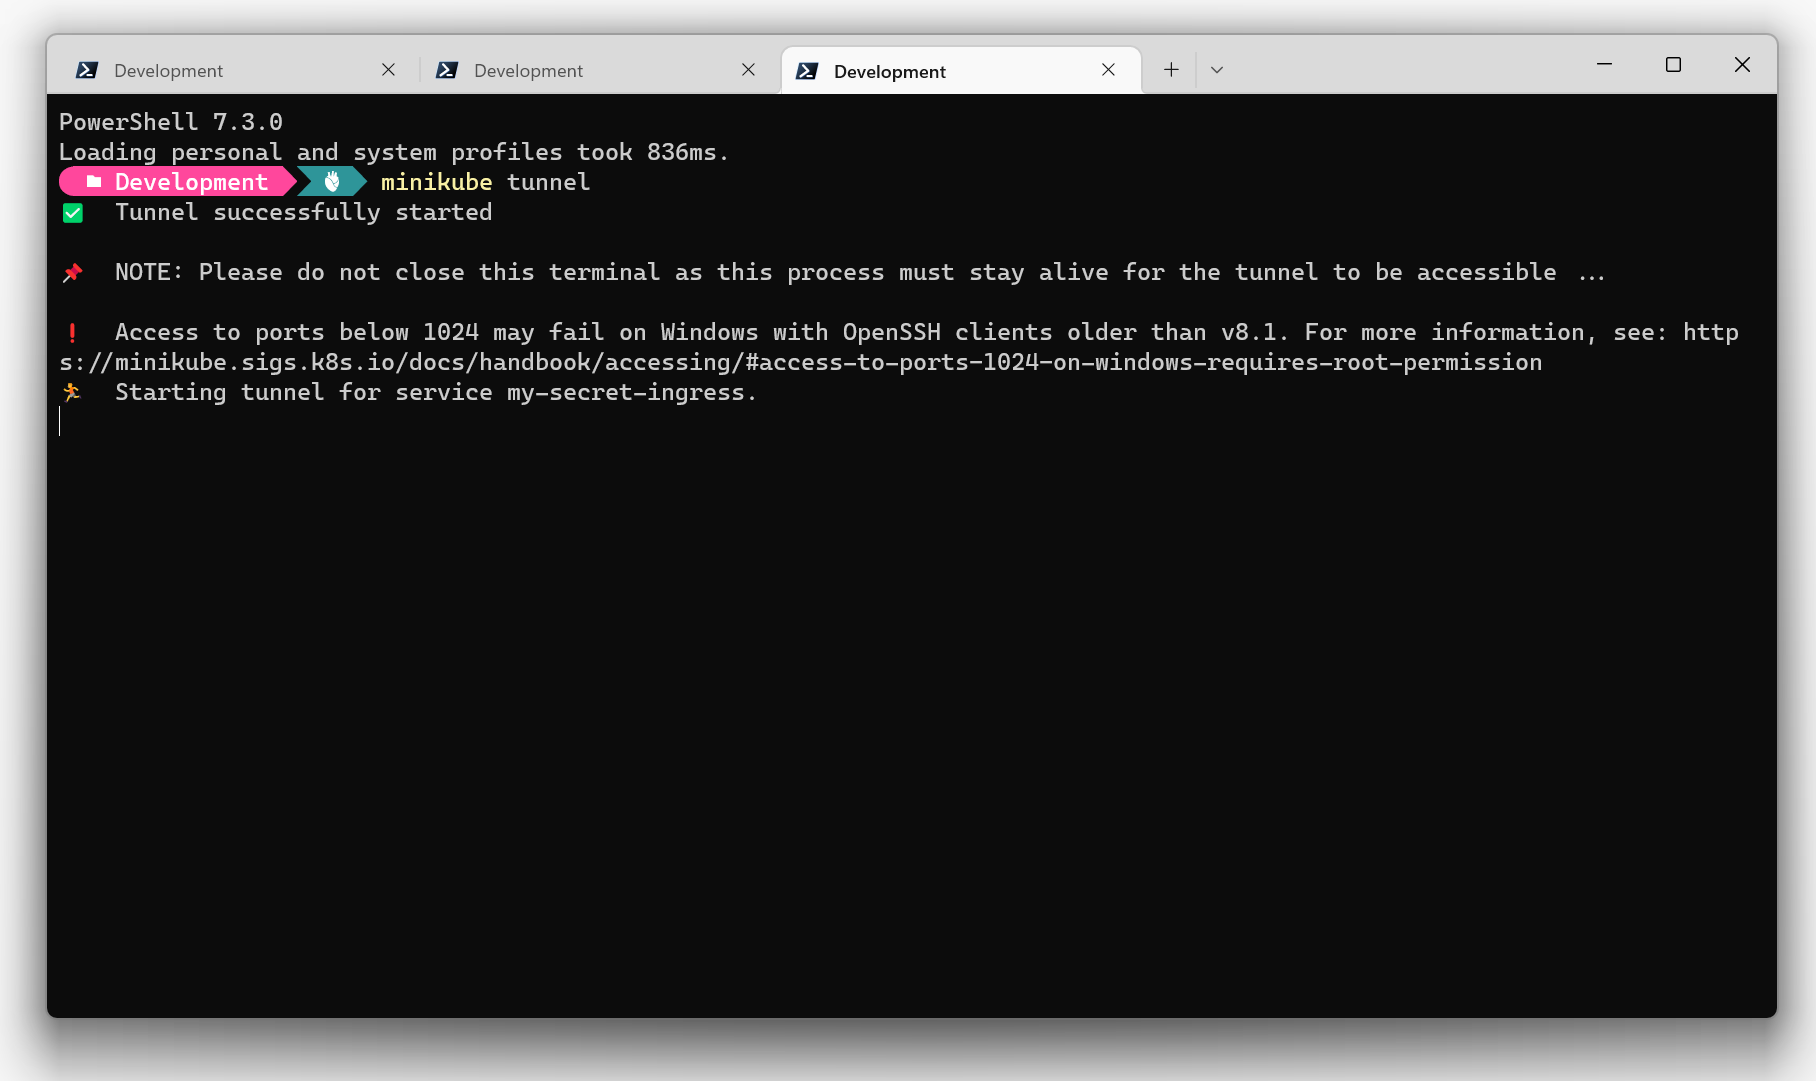
After refreshing the web page, the Website appeared. Result!
When done developing or tinkering, just stop Minikube by entering the following command.
minikube stop